How to Create a Diagnostic Exam and Capture Student Leads with StudySpaces
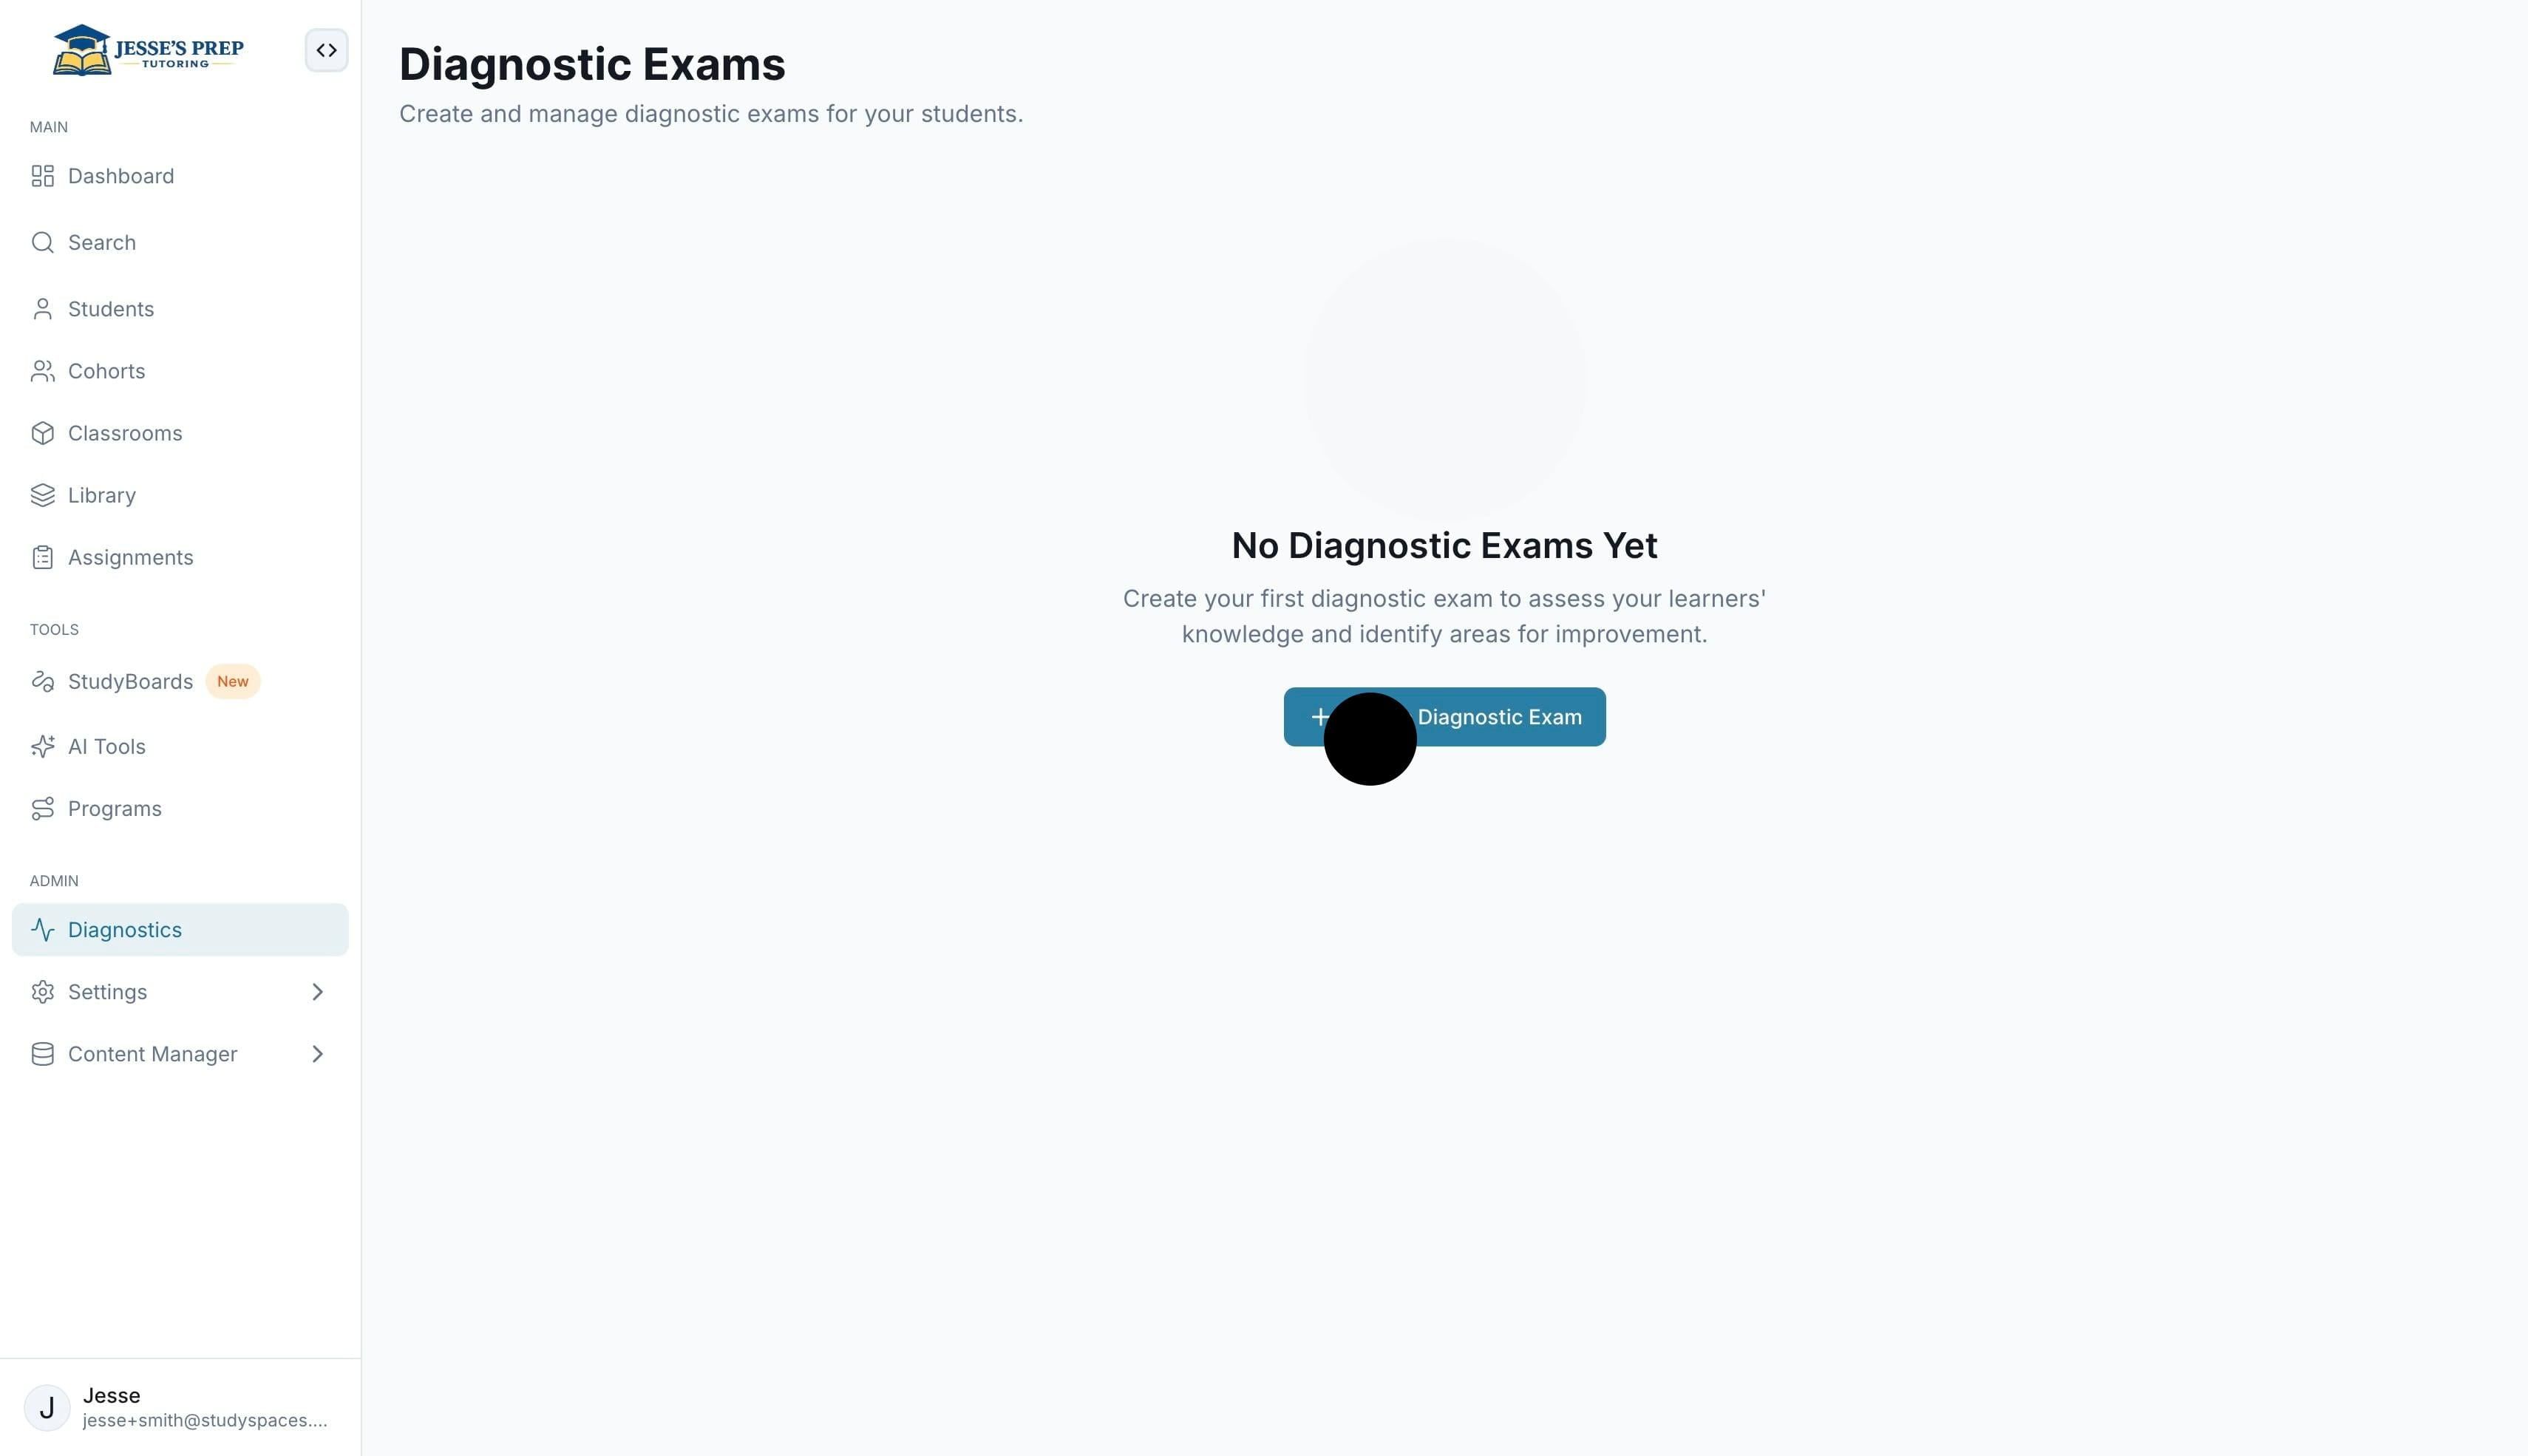
From your Dashboard, click "Diagnostics" in the left navigation menu. This is your hub for building and managing diagnostic assessments for your students.

From your Dashboard, click "Diagnostics" in the left navigation menu. This is your hub for building and managing diagnostic assessments for your students.
Click "Create Diagnostic Exam" to start building your first diagnostic assessment and begin tracking student progress.
Click "Create" to generate the diagnostic exam and add it to your assessments list.

Click "Open" on your newly created exam card to enter the editor and start building out your diagnostic assessment.

Go to the "Contents" tab in the left navigation to access the Exam Content area and add questions to your diagnostic assessment.

You can use an existing exam from your library. To build one from scratch, select “Add Questions”

Select the questions you want to add to the diagnostic assessment by clicking the “Add Questions” button

Once the questions have been added, click on “Settings” on the sidebar to configure the diagnostic experience.

Confirm the info on the General tab before clicking on the “Data Collection” tab.

Here you can decide what data fields you want to enable, and you can even create custom fields.

Once you are done configuring Data Collection, save changes and click on "Configs"

Here you can configure the student diagnostic experience with options like timers, a calculator, and more. You can also decide whether the student gets to see results and question review after they submit the assessment.

Once you are done, save changes and click on “End Screen”

Here you can create a custom screen with additional information or next steps for the student to follow after they submit the assessment.

Once you are done, save changes and click on “Overview”

Make sure to “Publish” the diagnostic first, so it is live and ready for preview

Click on “Preview” to test out the diagnostic experience

Fill out the input fields and “Start Diagnostic”

Complete the assessment

Once submitted, go back to your “Overview” screen to see the lead information. All leads collected can be found on your sidebar menu as well. Click on the lead to reveal Score Review, Question Review and End Screen (if enabled).

Click on "Questions Review"

Click on each question to reveal the student response and more.
